This is an introduction tutorial to the contact form plugin – Ninja Forms.
After installing and activating Ninja Forms go to Ninja Forms -> Dashboard:
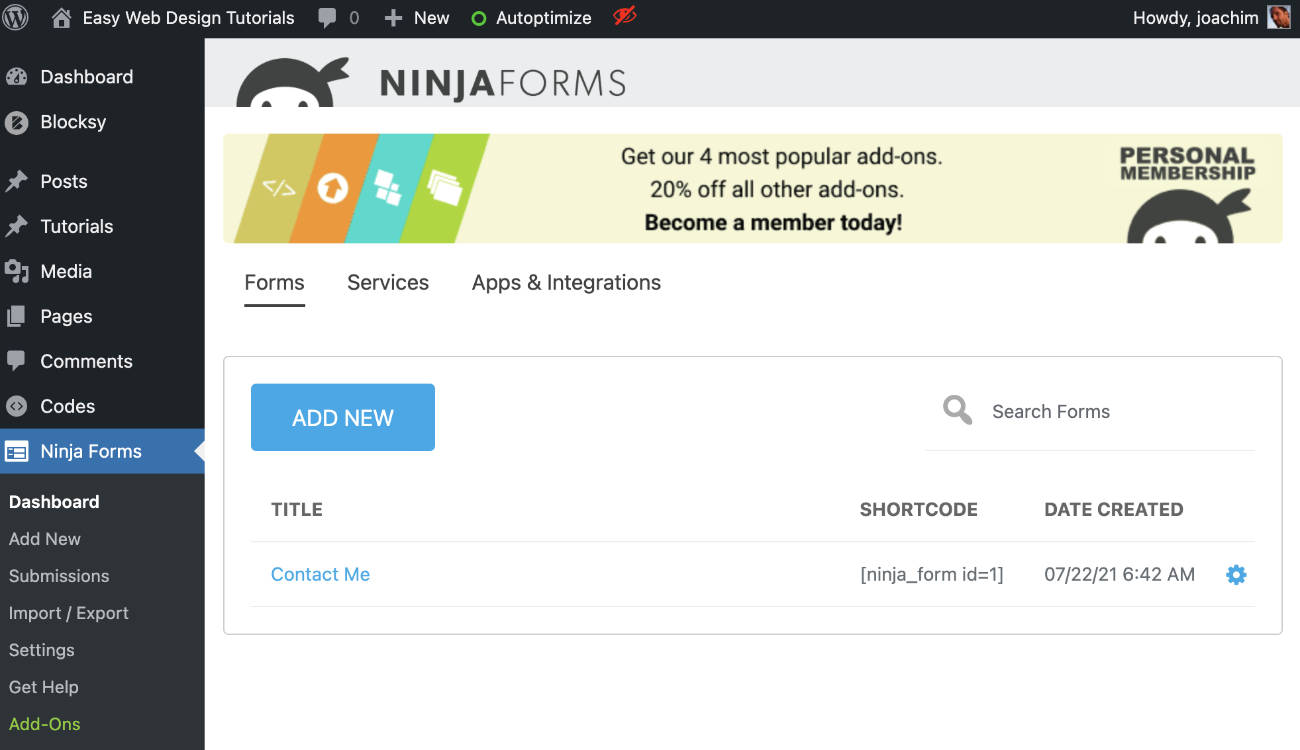
There are tabs for Forms, Services and Apps & Integrations.
Forms:
Shows the current forms. A shortcode and the date created.
Services:
Gives the option to install the “Add-on Manager” as well as installing “SendWP – Transactional Email.”
Apps & Integrations:
Gives options for memberships and various integrations being offered.
Dashboard Forms screen.
Going back to Forms screen. Clicking the icon to the right of the date and time will show a quick edit bar.
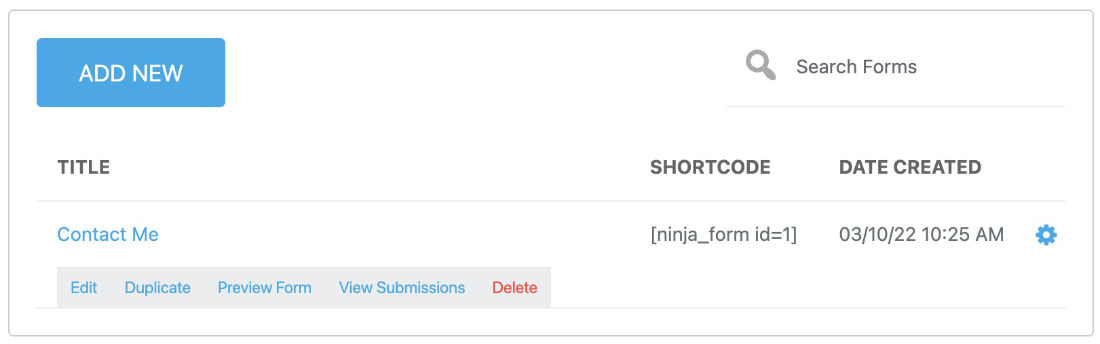
Here we can Edit the form (same as clicking the form title “Contact Me”), Duplicate, Preview Form, View Submissions and Delete the form.
Click either “Contact Me” or Edit to enter the forms area.
Forms Fields.

This is the main area to edit the form fields of a form. Notice the blue circle with a + sign at the bottom right. Upon clicking the blue circle half of the screen will be filled with various fields you can add to the form.
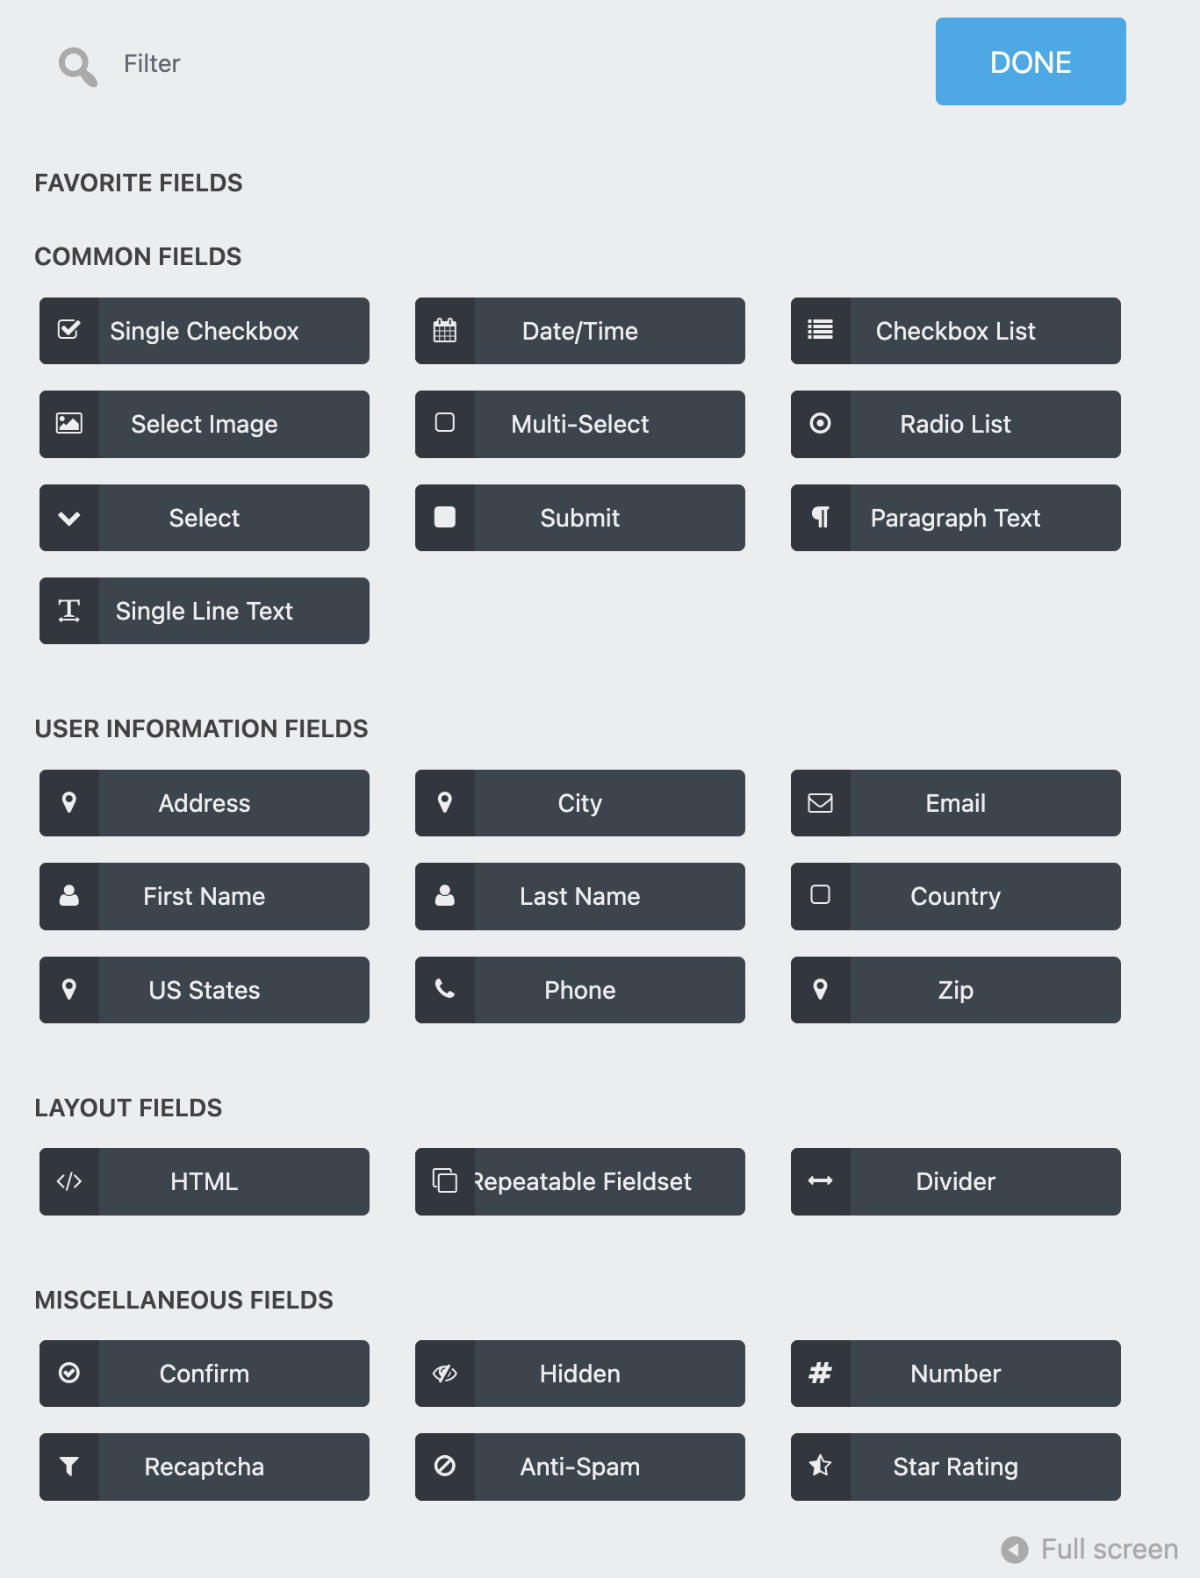
Single click to automatically add a field to the bottom of the form, or drag and drop the field directly where you would like to have it located. If you are not seeing all the fields then these might be hidden. Scroll further down the list to see the rest of the fields. When finished click the Done button (located top right).
Editing a single field.
The properties/settings of a single field.
In this example I added a “Single Line Text” field just below the Email field. I changed the name to “Subject” (could also be named regarding or something similar). I clicked to make it Required and clicked the word Display to see what was hidden below. I also filled out the various fields under Display.
NB! the adjustments will be seen in the preview after clicking the Done button. I reopened to edit the field to show what the preview looks like.
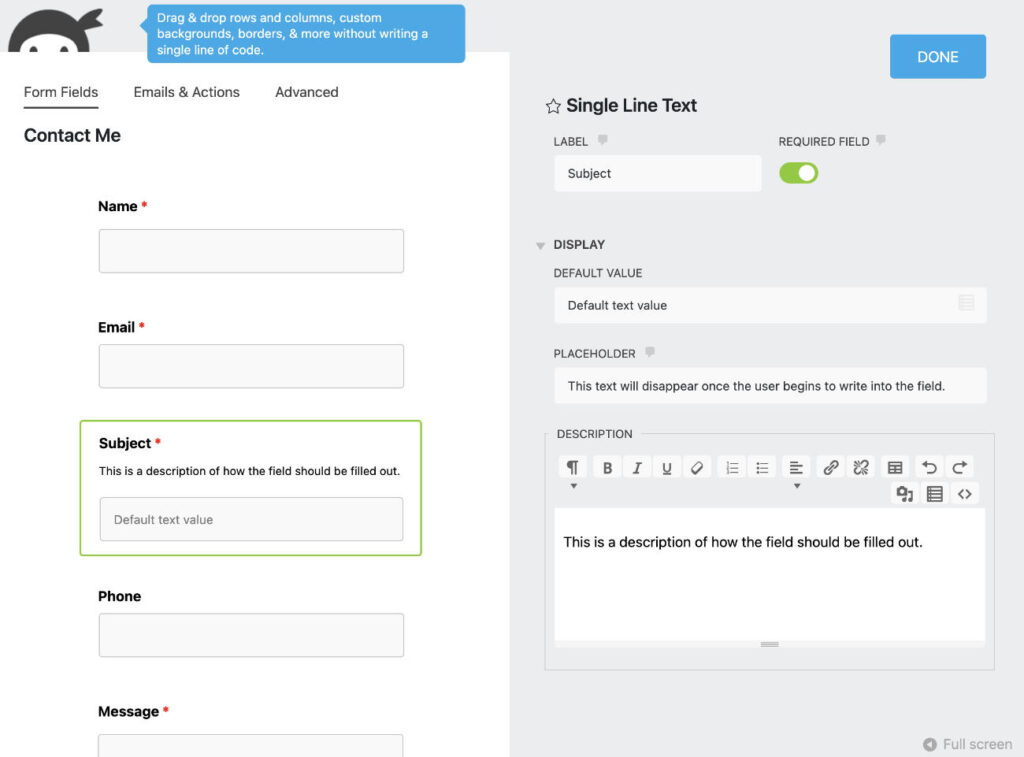
Display – will change depending on field selected.
Default value: Shows an already filled value in this field.
Placeholder: Gives a hint to the user how to fill out this field. The placeholder text will disappear as one begins to write into this field.
Description: Text will show up between the title and the field. Use it to write a description of what the field should be used for.
Click the various fields to open the properties/settings and see what adjustments can be made for each.
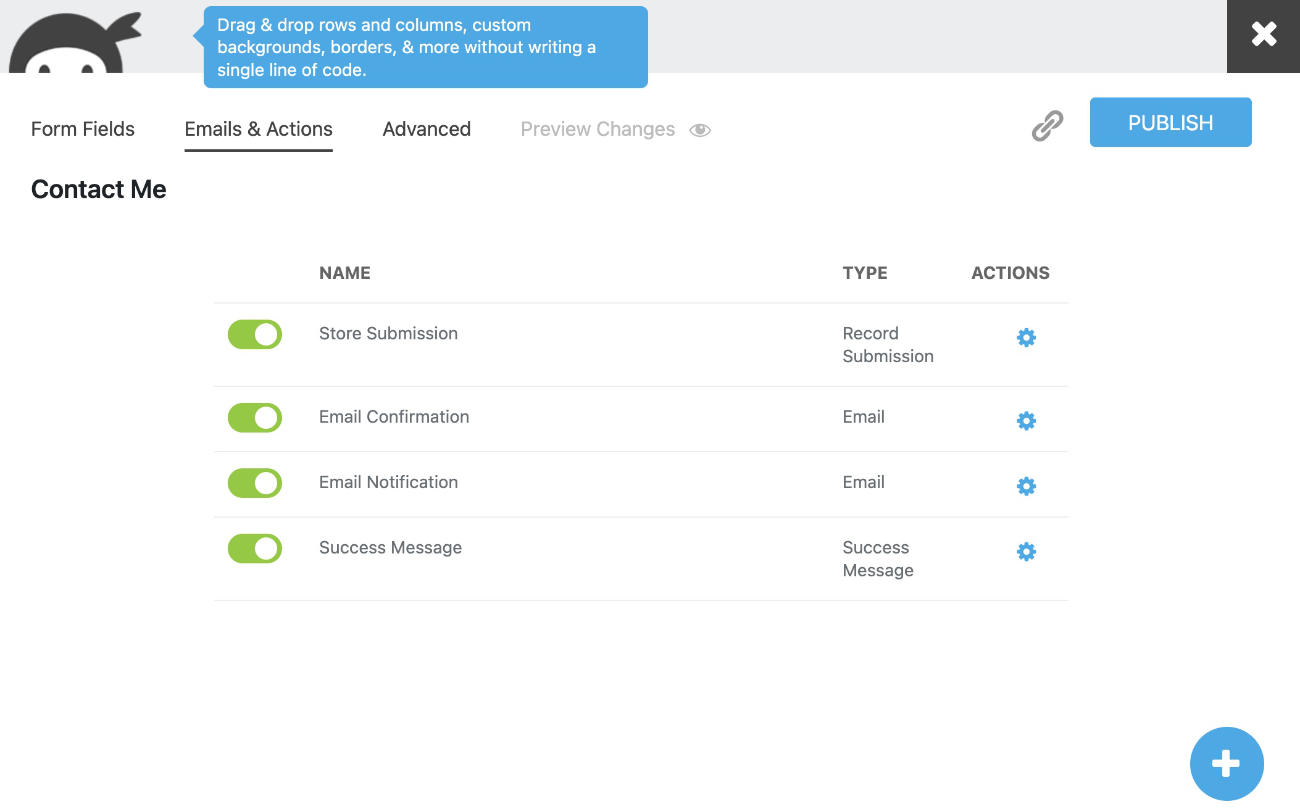
Emails & Actions
The tab after Form Fields is called Emails & Actions.
Below Name we see.
Store Submission. Advanced options for example setting submission to expire.
Email Confirmation: Adjust the email confirmation that is sent out to the user who submitted the form.
Email Notification: Adjust the email notification sent to the admin of the web site.
Success Message: Adjust the message seen on the web site after user has submitted the form.
Protecting the form. Ninja Forms have a built in protection called a honeypot which will capture any spam submissions. If spam still gets through one can for instance use Akismet anti-spam plugin as an additional protection.
Click the blue circle with a + sign in it to add a new action.

Click Akismet Anti-Spam. It will show up below the Success Message seen in the Emails & Actions screen. Adjust the fields which Akismet should protect by clicking the merge tag icon to the right of each field. Clicking the icon opens the following as seen in the below screenshot. Here we can see that I have already selected field:name for the Name field and I am now about to select Email for the Email field. Go through each and select the correct field (best guess) for the tags you find.
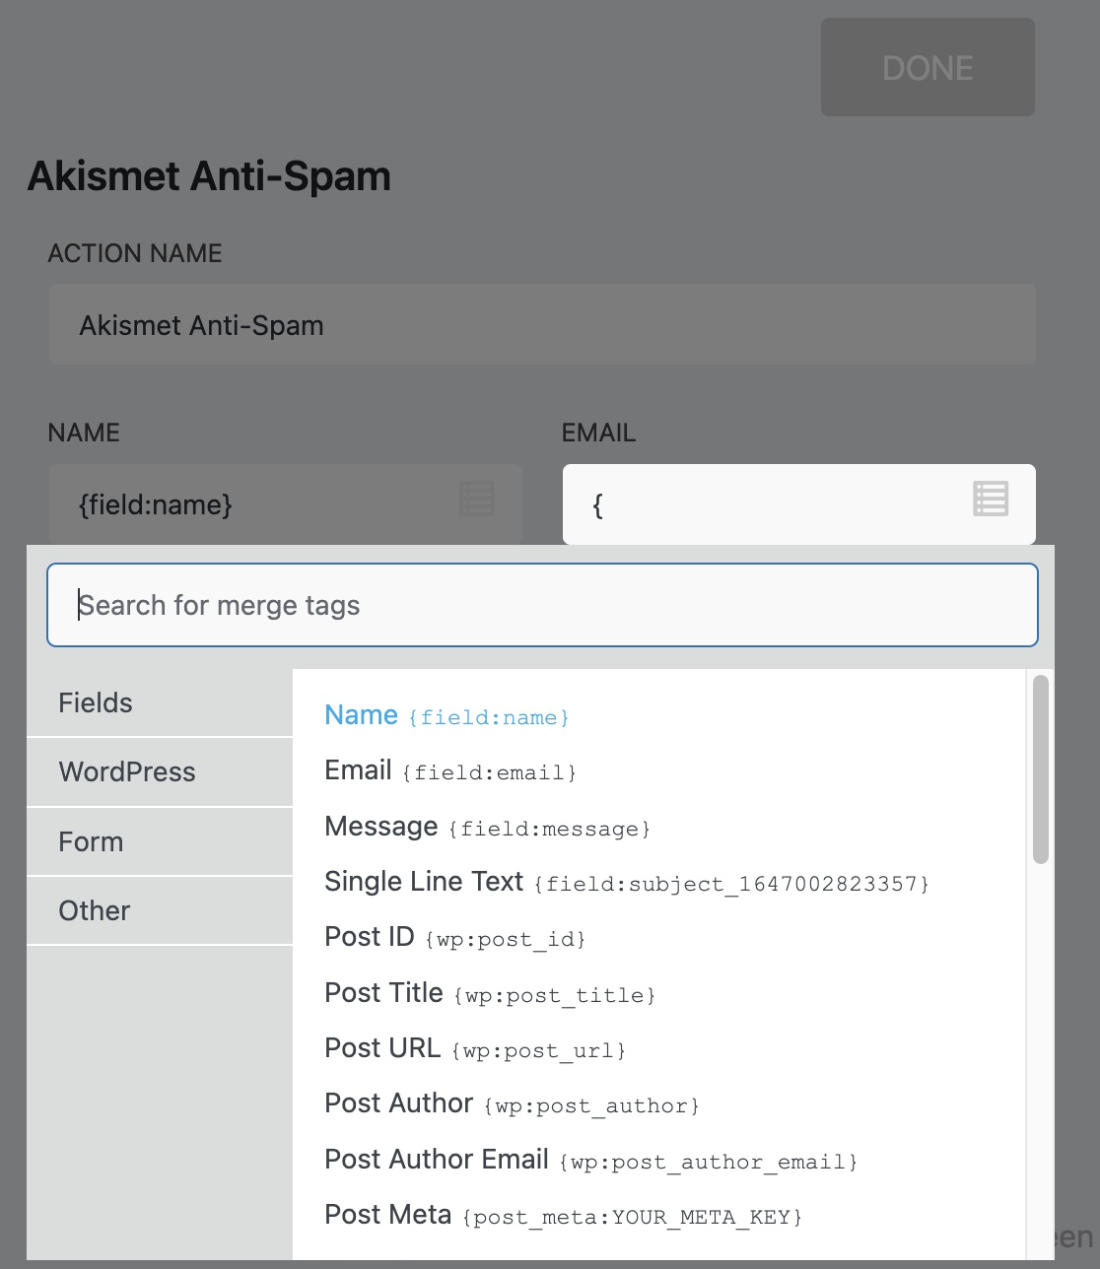
Click Done when finished. Akismet has now been setup as an extra protection for your form.
https://ninjaforms.com/docs/akismet-anti-spam-action/
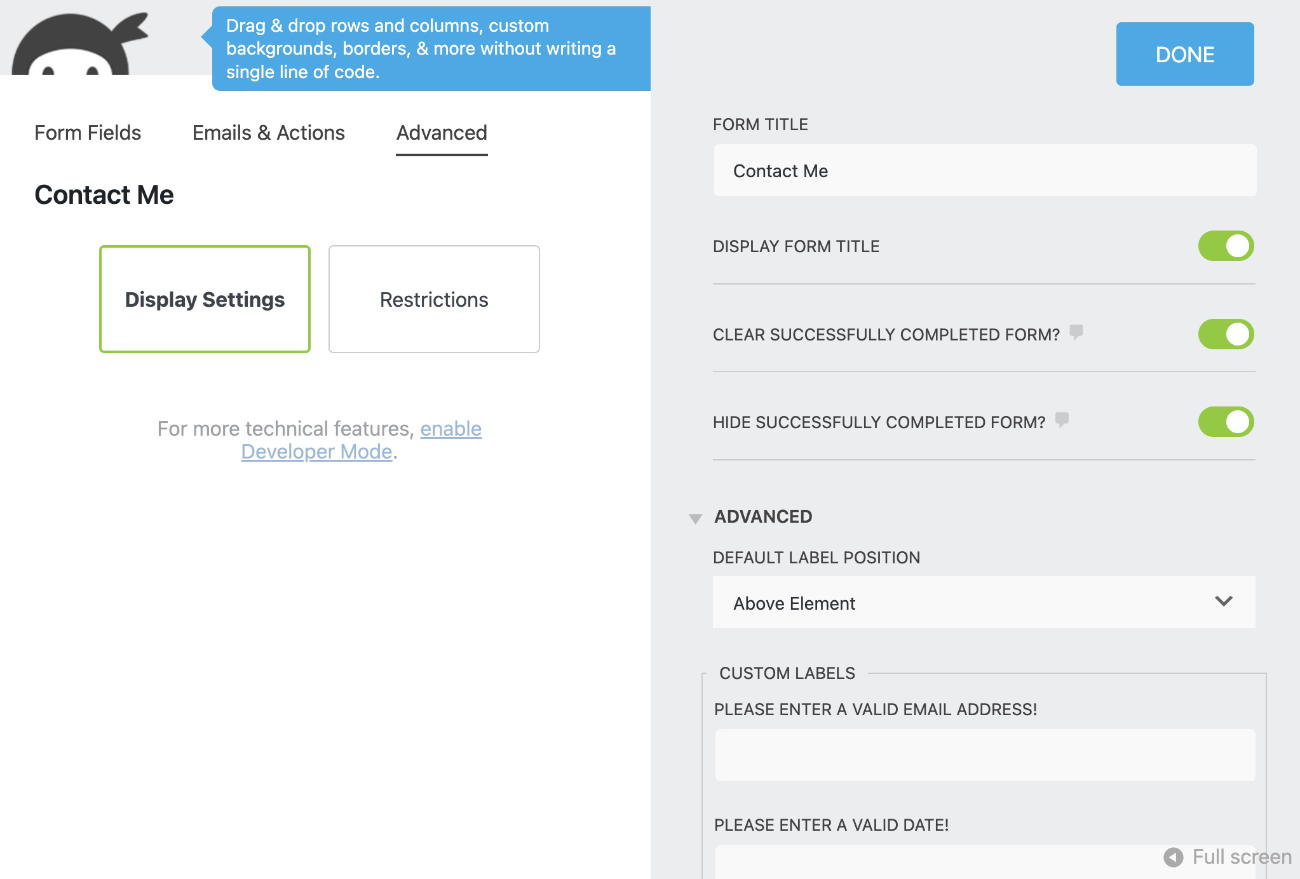
Advanced
Display Settings: Adjust the form title, display the form title, clear the form after it has been sent and hide the sent form.
Advanced. Adjust the default label position, adjust the custom labels.
Restrictions: Unique fields, require user to be logged in to view form, submission limit.
https://ninjaforms.com/docs/unique-field-validation/
We have now gone through the various Form Fields, Emails & Actions and Advanced screens.
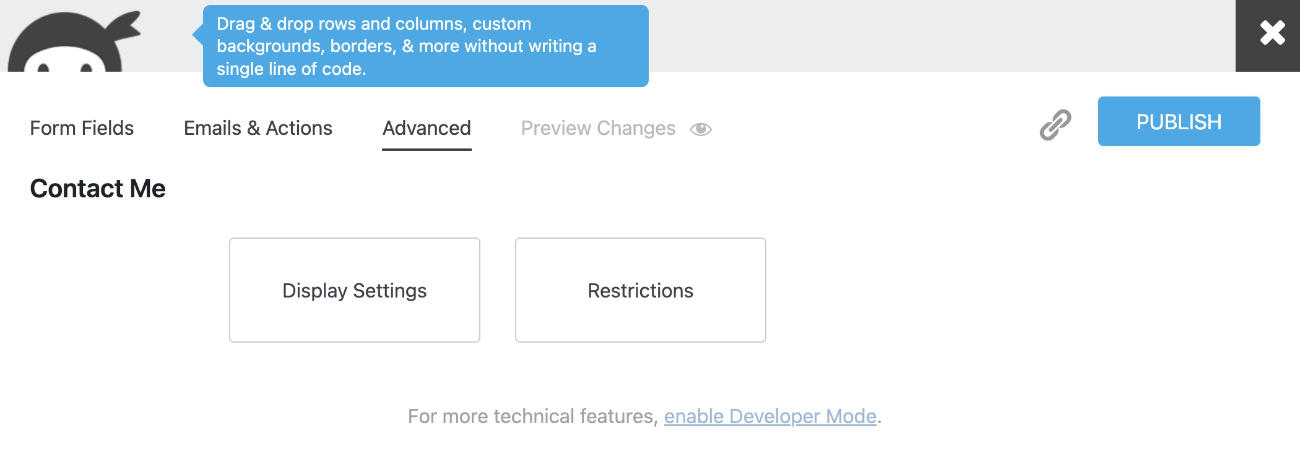
Preview Changes
It is now time to click “Preview Changes -eye-” and see what he form looks like.
NB! You might see this message:
“This form is currently undergoing maintenance. Please try again later.”
Here we need to turn off maintenance mode. Go to Ninja Forms -> Settings and scroll to the bottom. Click the button where it says “Remove Maintenance Mode”. Re-check the contact form preview. This time the form preview should be seen.
When you are finished with editing the Ninja Forms contact form.
When you are satisfied with the form fields. Click the Publish button. Click the X in the top right corner to leave the edit form screens.
Additional Ninja Form screens
Submissions: Select which form to grab submissions from, and filter by dates if needed.
Import/Export: Import and Export your forms.
Settings: Various settings as well as Licenses for Ninja Forms.
Get Help: Links to Documentation, troubleshooting and an overview of system environment.
Add-Ons: Overview of various add-ons available for purchase.
Resources:
https://ninjaforms.com/documentation/
This tutorial was originally written 4 April 2014.