How to take a screenshot on Mac OSX.
There are a few methods to take a screenshot on the Mac OSX using the default Screenshot software. Located inside the Application -> Utilities.
⇧⌘ 3 = Command + Shift + 3 for a screenshot of the entire desktop. (This option will also capture the location of the mouse cursor.)
⇧⌘ 4 = Command + Shift + 4 for a set of crosshairs that allow you to select the area of the screen you want to grab. Press and hold the space bar to move the selected area.
⇧⌘ 4 = Command +Shift + 4 + Spacebar takes a screenshot of only the window the user has selected.
⇧⌘ = Command+Shift+5 Will also show the screen grab toolbar.
Changing the default screenshot format PNG to JPG.
I take a lot of screenshots and I have noticed that PNG files can become fairly large. Changing to JPG will help. To change the screenshot open/launch the terminal software.
Inside Applications -> Utilities -> Terminal
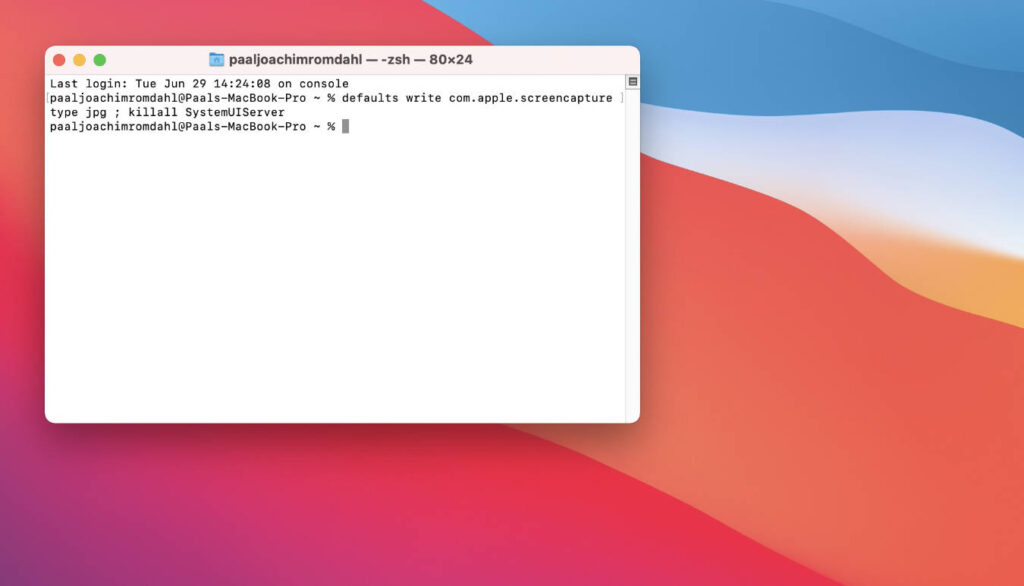
Add the following code:
defaults write com.apple.screencapture type jpg ; killall SystemUIServerOne can choose among these file formats: JPG, TIFF, GIF, PDF, or PNG. Switch out the above mention of jpg with any format you choose.
killall SystemUIServer: This command will reset the screen capture process.

Press enter/return. (A restart might not be needed.)
Take a new screenshot and check to see that the screenshot is now a jpg file. Right click the screenshot and select “Get Info” or use the shortcut cmd + i.
For additional tips check out these articles I used:
https://macreports.com/how-to-change-the-default-screenshot-file-format-png-to-jpg-tiff-gif-bmp-or-pdf-in-macos/

