Currently with Gutenberg / Block editor we can create a Social Media menu, by adding the Social Icons block. In the backend in a post or page. Write /social and it will show up or top left click the blue square icon with a + sign (block inserter). Write social or scroll to you find the block under the Widgets area.
By default when selected the Social Icons block looks like this:

Click the black square + icon to add various social media. Fill in the URL for each.
– Click between the icons (left/right of these) or
– the Social icons left toolbar icon to select the parent / Top settings for the Social Media block.
Take a look at the settings to how you can manage the block.
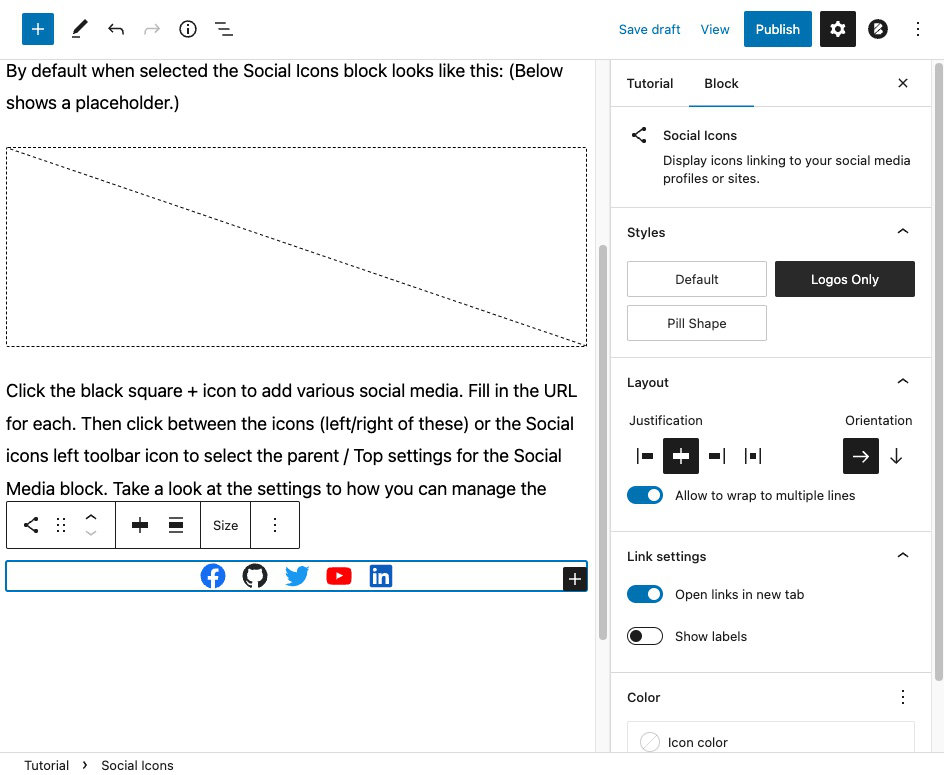
A finished Social Media block showing various links.
These are active links that will open a new tab to each of the social media sites where I have a profile.
Adding a filled in Social media block to each post or page.
Adding it to every post or page is a bit more tricky but is being worked on in Gutenberg. The Navigation block is also being worked on to where we can add a Naivation block containing a Social menu.
One way to add social media links is to save the block as a Reusable block and then add the Reusable block into each post. When changing a Reusable block each instance used will also change.
Older tutorial originally published 26 September 2014.
The following Social menu article is based on this tutorial by The Web Princess.
It has been coded for Genesis themes but can also be readjusted for other themes. It uses icons by fontawesome.io I added the new social menu to the header area of my web site.
In your Child Theme functions.php file or in a code snippet add this code:
/** Enqueue Font Awesome from CDN if your theme hasn't already included Font Awesome **/

add_action( 'wp_enqueue_scripts', 'twp_enqueue_awesome' );
/**
* Register and load font awesome CSS files using a CDN.
*
* @link https://www.bootstrapcdn.com/#fontawesome
* @author The Web Princess
*/
function twp_enqueue_awesome() {
wp_enqueue_style( 'prefix-font-awesome', '//netdna.bootstrapcdn.com/font-awesome/4.0.3/css/font-awesome.css', array(), '4.0.3' );
}
/**
* Set up Social Menu Location */

function register_my_menu() {
 register_nav_menu('social',__( 'Social Menu' ));
}
add_action( 'init', 'register_my_menu' );

/** Add your Social Menu to genesis_header - you can use other hook locations as you wish **/

add_action( 'genesis_header','twp_genesis_add_social', 10 );
/**
* Set up Custom Menu for Social Icons.
 *
 * @link https://thewebprincess.com/new-genesis-social-icon-menu/
 * @author The Web Princess
 *
 * @return null Return early if menu does not exist.
*/

function twp_genesis_add_social() {
    if ( ! has_nav_menu( 'social' ) ) {
          return;
    }
   echo '<h4 class="social-title widgettitle widget-title">Connect</h4>';
   $nav_args = array(
         'theme_location' => 'social',
         'container' => 'div',
         'container_id' => 'menu-social',
         'container_class' => 'menu menu-social',
         'menu_id' => 'menu-social-items',
         'menu_class' => 'menu-items',
         'depth' => 1,
         'link_before' => '<span class="screen-reader-text">',
         'link_after' => '</span>',
         'fallback_cb' => '',
 );
 wp_nav_menu( $nav_args );
}
Here is the code I added to my CSS stylesheet to customize the menu.
You will of course need to adjust these to fit your theme.
/* Social Menu - https://thewebprincess.com/code-snippet/font-awesome-social-icons-menu/
--------------------------------------------- */

.social-title {
 float: right;
 display: none;
}

.screen-reader-text {
 position: absolute;
 top: -9999em;
 left: -9999em;
}

.menu-social {
 float: right;
 margin-right: 5px;
 width: 140px;
 background: #fff;
 border: 1px solid #ccc;
 border-radius: 7px;
 box-shadow: 0px 1px 2px #444;
}

.menu-social ul {
 list-style: none;
 text-align: center;
}

.menu-social ul li {
 display: inline-block;
 position: relative;
}

.menu-social li a:before {
 content: '\f005';
 display: inline-block;

 margin: 0 5px 0 5px;
 font-family: 'FontAwesome';
 font-size: 24px;
 vertical-align: top;
 -webkit-font-smoothing: antialiased;
}

.menu-social li a[href*="facebook.com"]:before {
/* content: '\f09a'; */
 content: '\f082'; /* facebook-square */
 color: #3b5998;
}
.menu-social li a[href*="twitter.com"]:before {
 content: '\f099';
/* content: '\f081'; /* twitter-square */
 color: #33ccff;
}
.menu-social li a[href*="plus.google.com"]:before {
/* content: '\f0d5'; */
 content: '\f0d4'; /* google-plus square */
 color: #3b5998;
}
.menu-social li a[href*="linkedin.com"]:before {
/* content: '\f0e1'; */
 content: '\f08c'; /* linkedin-square */
 color: #3b5998;
}
.menu-social li a[href*="github.com"]:before {
 content: '\f09b';
/* content: '\f113'; /* github-alt */
/* content: '\f092'; /* github-square */
}
.menu-social li a[href*="youtube.com"]:before {
/* content: '\f167'; */
/* content: '\f16a';/* youtube-play */
 content: '\f166';/* youtube-square */
 color: #af2906;
}
The social Menu has now been added to Appearance -> Menus -> Manage Locations.
Create a new menu.
Add links. If Links box is not visible open Screen Options and select it. Add links to your various social media profiles.
IF you want the links to open in a new tab/window then through Screen Options select Link Target. It will under the Navigation Label add a checkbox to where you can have it open in a new window/tab.
