Customizing the appearance or behavior of your Fluent Forms is often necessary when you’re looking for more control over your form design or interactivity. Whether you’re styling your fields with CSS or adding a bit of JavaScript for dynamic behavior, Fluent Forms makes this easy—if you know where to look.
In this quick tutorial, I’ll show you how to add custom CSS to your forms, using the built-in settings.
I noticed that the Input text in a form is very small compared to the regular text used on the page. I wanted to do something about this so I looked for areas of Fluent Forms to where I might be able to adjust the input text size. As I did not locate any setting for this I had to add some custom CSS.
1- I went to the frontend and wrote some text into the input field. I then right clicked and selected Inspect and saw the below Console (Elements) tab in the Brave browser.
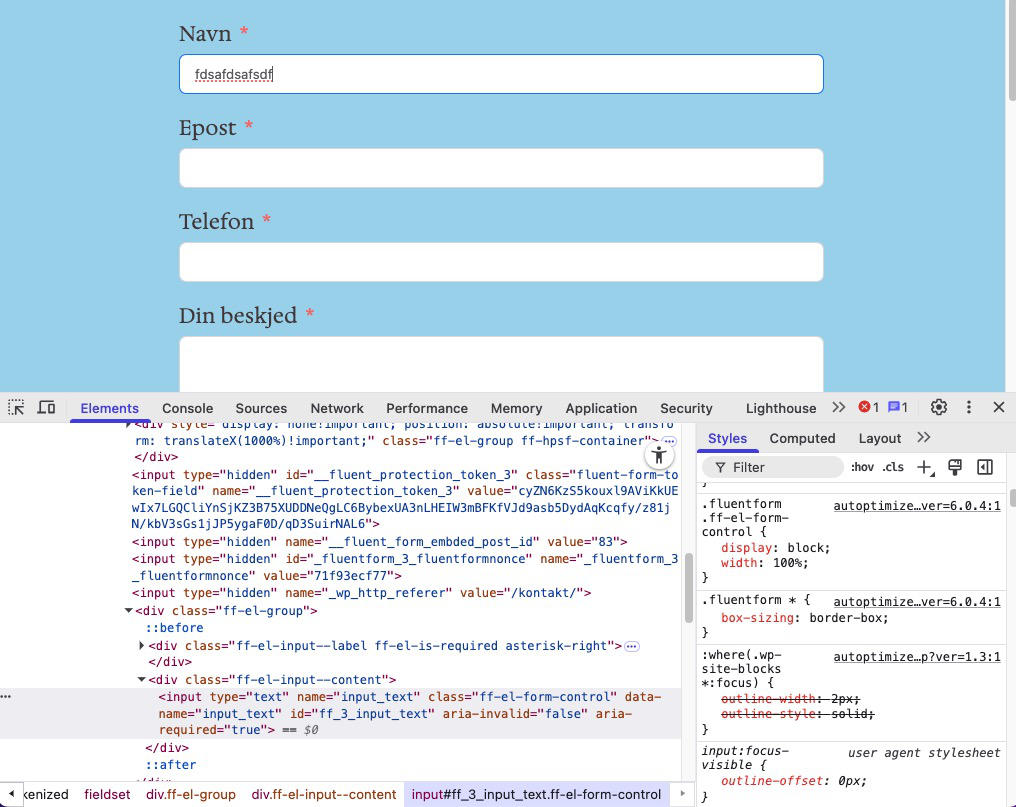
2- Noticed the CSS on the right and the breadcrumbs on the bottom. Containing this CSS:
.fluentform .ff-el-form-control {
display: block;
width: 100%;
}
3- Clicked into the CSS code and added this line:
font-size: 1em;4- Clicked into the Input text field and wrote some text and noticed the text was now the same size as the general text on the web site.
5- Copied all the code.
6- Went into the backend. Selected Fluent Forms. Selected a form. Went to Settings & Integrations -> Custom CSS/JS and added in this code:
.fluentform .ff-el-form-control{
font-size: 1em;
}
Scrolled to the bottom and clicked Save CSS & JS.
NB! Custom CSS/JS only works for one form so it needs to be repeated for other forms as well.
7- Checked the frontend of the form I adjusted. Wrote some words into the form to see that the input field had been adjusted to become the same size as the text on the site.
Here is a video showing the steps.