Having a Google Analytics account will help we gain a deeper understanding of the visitors to a website. Go to setup a Google Analytics account gives an overview of the process.
1 – Click the button: “Get started today”
2 – Here we need to sign in to an Gmail e-mail account.
3 – After signing in we arrive at a Welcome to Google Analytics screen.
At the bottom is a link to Learn more about Google Analytics.
Click the button: “Start measuring”
4- Account setup.
Add an Account name. Look through the various options.
Click the button: “Next”
5- Property setup. Property represents a business’s web and/or data. An account can contain one or more properties. How Google Analytics is organized.
Add a Property name.
Time zone.
Currency.
Click the button: “Next”
6- Business information. Creates a better focused experience.
Industry.
Business size.
How do you intend to use Google Analytics with your business?
Click the button: “Create”
7- A popup modal is seen with a Google Analytics Terms of Service Agreement form.
Click the checkbox and then click “I Accept” button to move onward.
8- Adjust the newsletter settings for email they send out, and move onward.
9- Google Analytics dashboard. Go through the tips.
10- At the top a pink notification area is seen that contain: “Can’t find any data streams. Please set up a stream to start collecting data in this property. Click the button: “Go to stream setup”
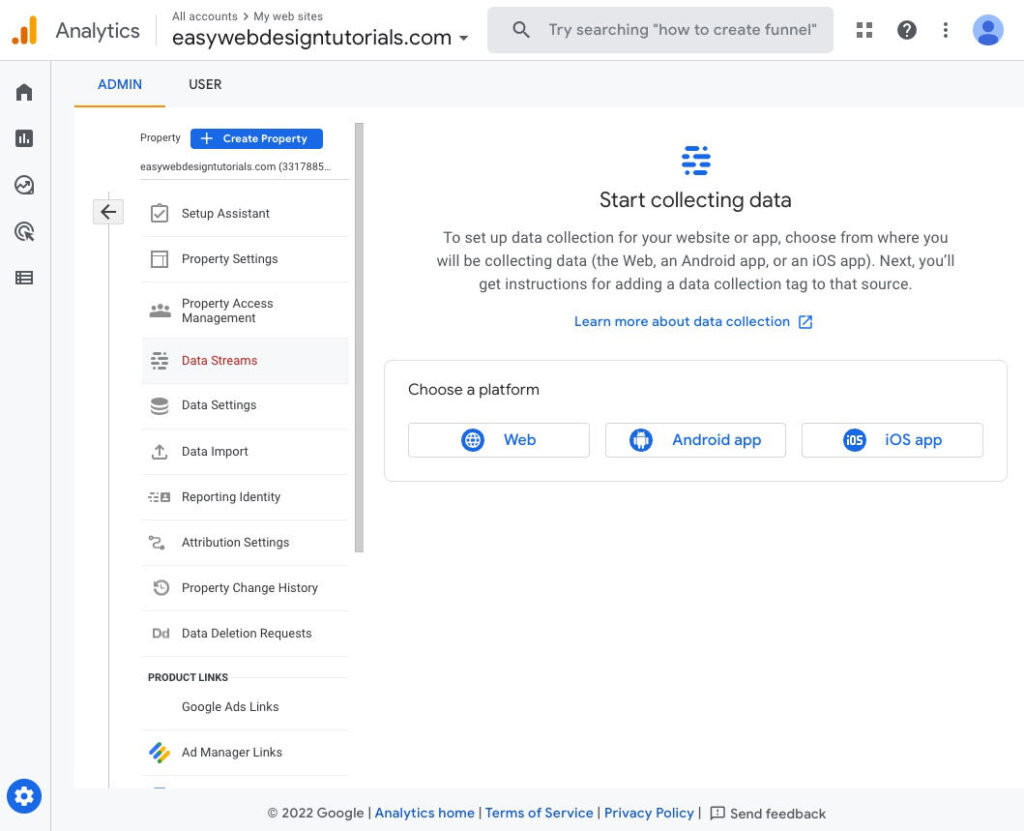
11- Start collecting data. Learn more about data collection.
Choose a platform: Web – Android app – iOS app.
I selected Web.
12- Set up your web stream.
Website URL
Stream name
Click the button: “Create stream”
13- Web stream details.
View tag instructions to get information on how to install the Google tag through a website builder or manually.
Install with a website builder: Drupal, duda, Monster Insights, TYPO3 or Wix.
Install manually. Code that goes into the <head> element of a web site. Code is unique to the account.
Here is an example code.
<!-- Google tag (gtag.js) -->
<script async src="https://www.googletagmanager.com/gtag/js?id=G-N82M0N2BYX"></script>
<script>
  window.dataLayer = window.dataLayer || [];
  function gtag(){dataLayer.push(arguments);}
  gtag('js', new Date());

  gtag('config', 'G-N82M0N2BYX');
</script>
I plan to use a Code Snippet plugin to add the code to the <head> of a web site.
I made a tutorial showing how to add code to the header in WordPress.
14- After adding the code automatic through a plugin or manually through code. Some time will need to pass before it is discovered by Google.
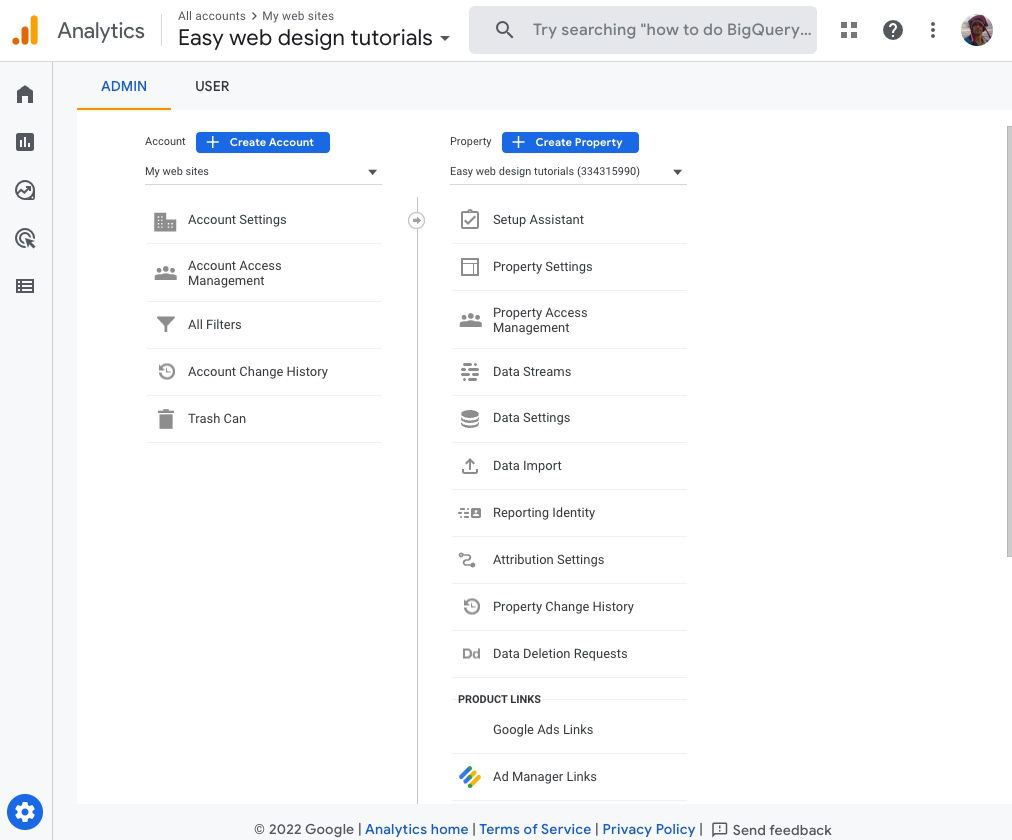
Click the arrow seen to the left of Setup Assistant in the Create Property column to move backward to see the Account Settings. In ADMIN view.
15- Here one can add additional properties to other web sites that are to be a part of the same Account.
I will add on to this tutorial on additional aspects of Google Analytics. Do also check the various links I have added as there is plenty of information to read up on.
This article was originally published 19 / 21 March 2015.
Resources:
[GA4] Add, edit, and delete Analytics users and user groups

