Here is an affiliate link to where you can purchase the Fluent Forms Pro plugin and I will get a small payment.
One can use Fluent Forms Pro to create various types of order forms. Instead of using a heavier plugin to sell products it works well using Fluent Forms to do so. This is the basic setup for creating a payment order form.
I made this tutorial for there were various aspects that I did not understand even after going through various other tutorials. I gradually with help figured it out. I went ahead and added my affiliate link if you would like to purchase Fluent Forms Pro.
A while ago I switched to using Fluent Forms Pro. One aspect I have begun to explore is creating an order form with payment.
Here is a step by step video tutorial I made.
Written directions are just below.
Step by step
Enable the Payment option in Fluent Forms Pro.
When the Pro plugin is activated a Payment area is seen in the Global Settings.
Go to: Global Settings -> Payment -> Enable Payment Module.
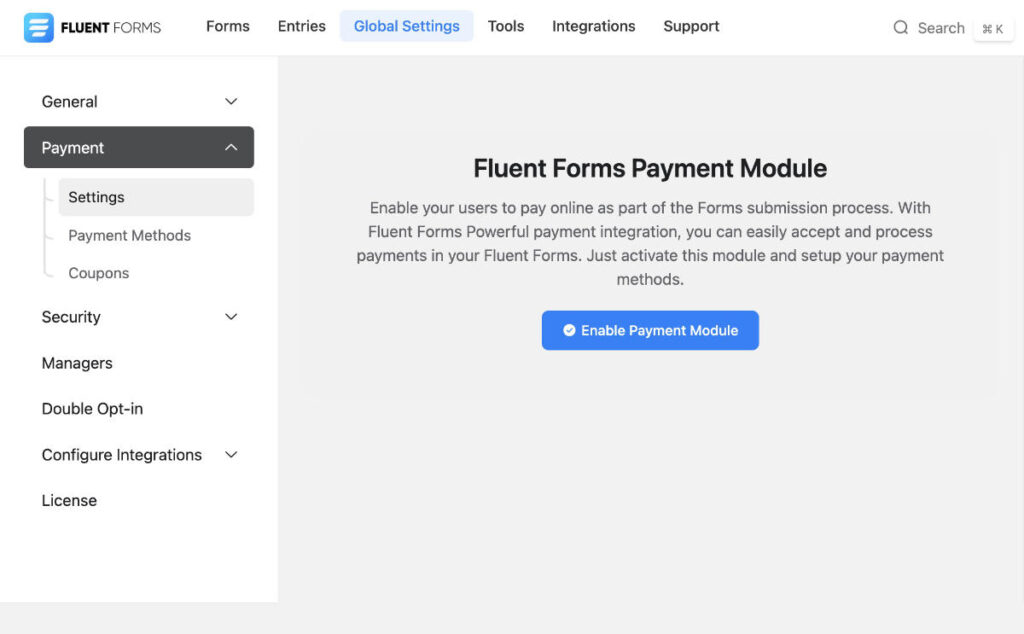
Payment Settings, Payment Methods and Coupons
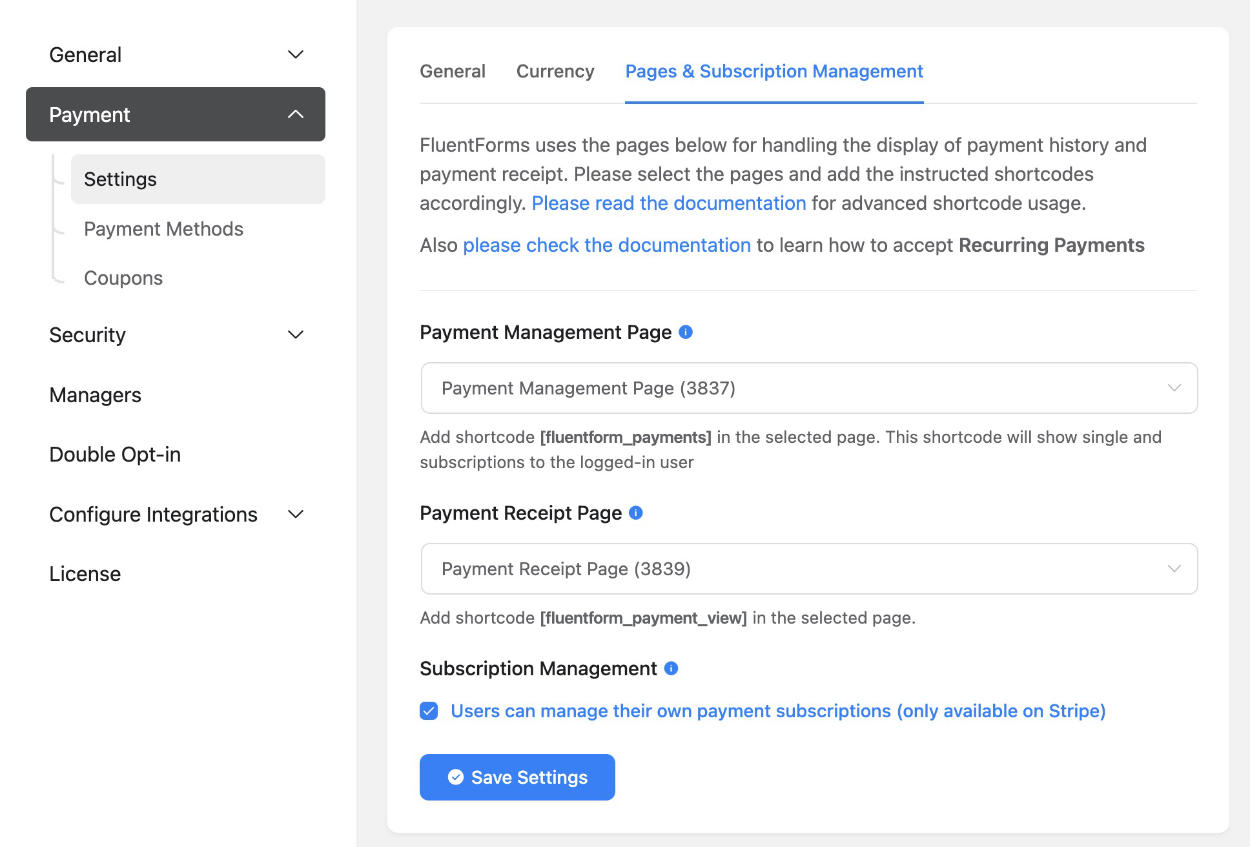
Payment Settings: General, Currency and Pages & Subscription Management.
1. Go to the WordPress Pages screen and create two pages that contain the shortcode mentioned in the below screen. One page for Payment Management Page and one for the Payment Receipt Page.
2. Come back to the Pages & Subscription Management page and connect the pages through the drop down.
These pages will be used for viewing the payments done after having purchased a product.
Payment -> Payment Methods

Here one can enable various payment methods. I enabled the Test Payment for this tutorial. It is a good way to test out how things work before setting up the real payment needed for orders. Coupons I skipped for now in this tutorial.
The order form
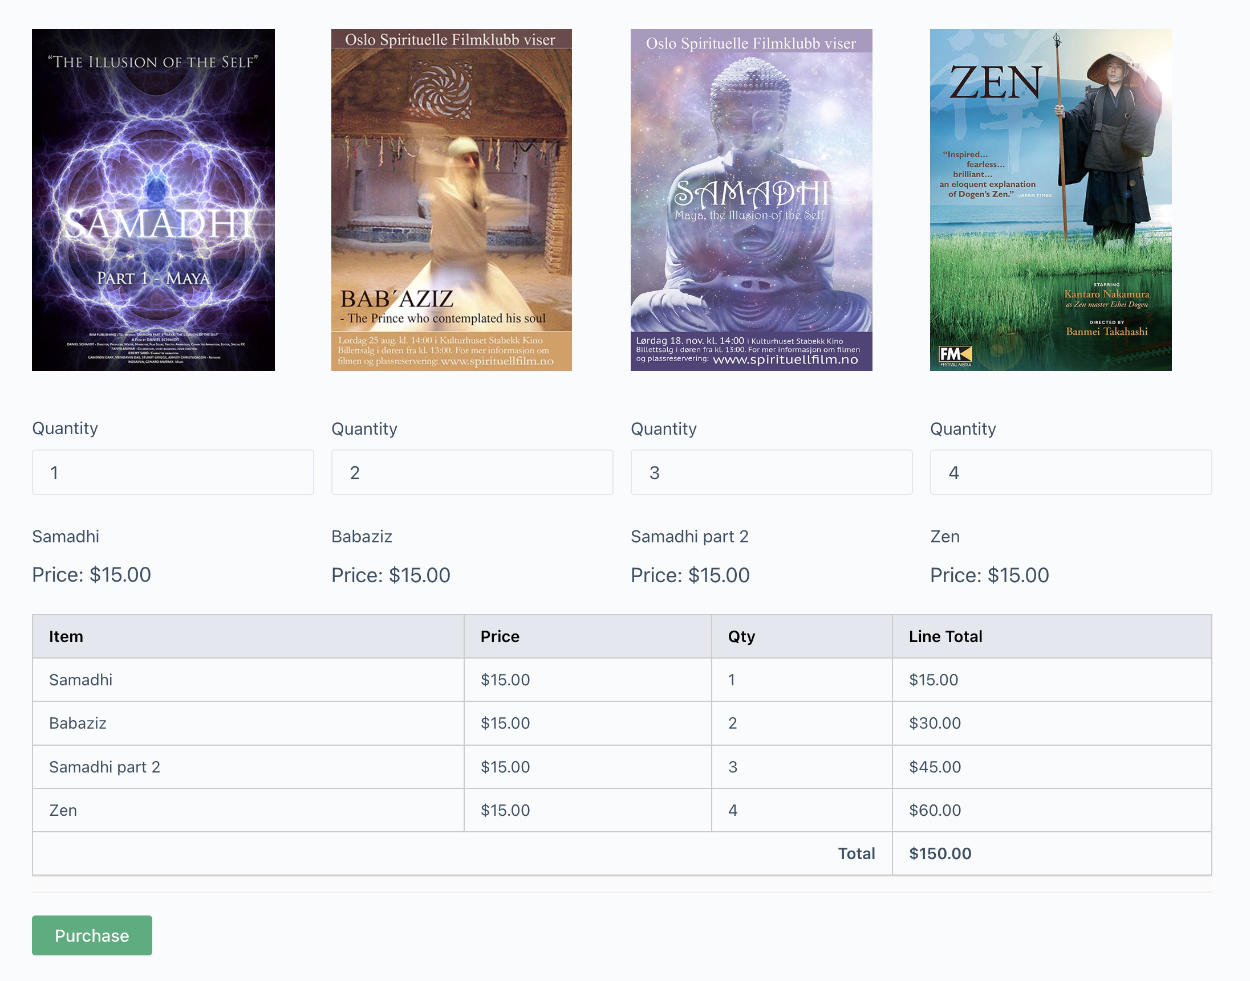
A Four Column container field. Which include the following fields.
A Custom HTML block where an image is added.
Item Quantity field. Connected / Mapped to the Payment item just below each product.
Payment Item.
Payment Summary. Which will first appear as blank. Filling in quantity will show the result in the summary.
Submit button: Button text changed to reflect that this is a purchase.
Here one would add additional fields that are needed. My focus for this tutorial is only on adding the flow of ordering a product.
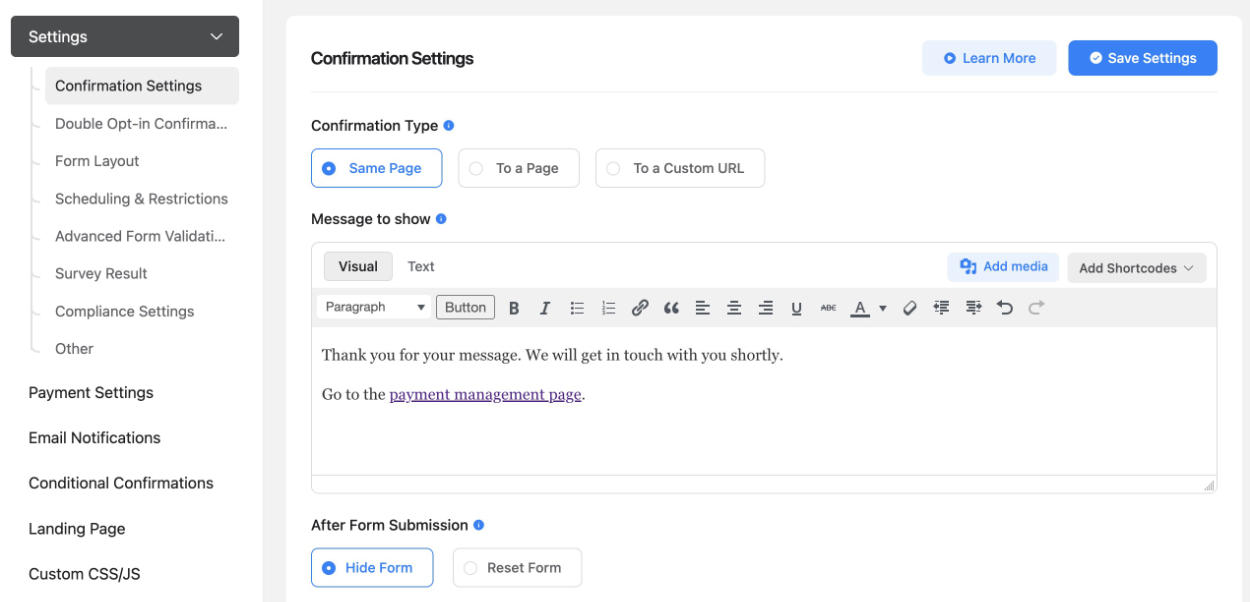
Adding a Payment Management page link to the email confirmation message
Go to all pages and find the Payment Management Page made earlier and view the page. Copy the URL link.
Go to the form. Settings -> Confirmation Settings. Add the link into the confirmation message.
Go to a page or create a new where you want to include the Order form
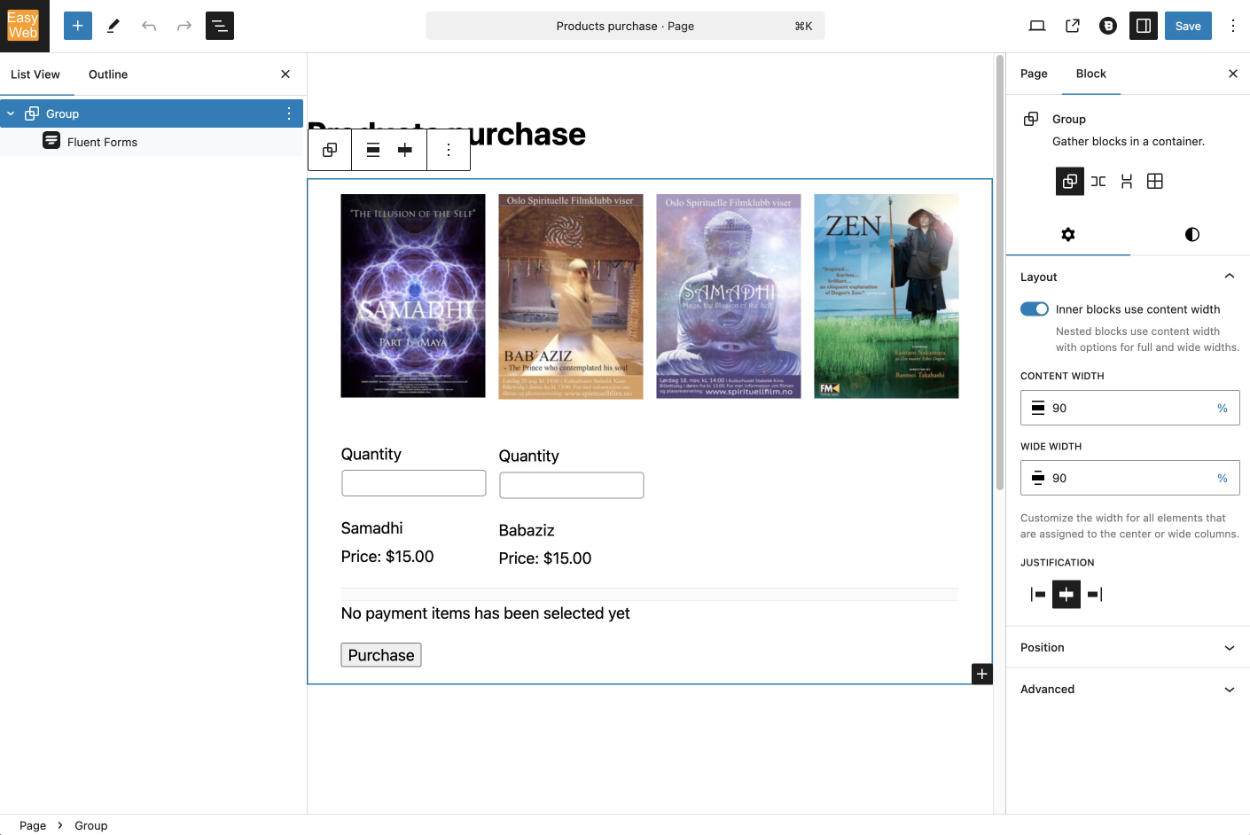
Add the form to a page.
Here is a tip.
To control the width of the form add Fluent Forms block it into a Group block. As the Group block is selected, Change the Content Width.
Here is an example.
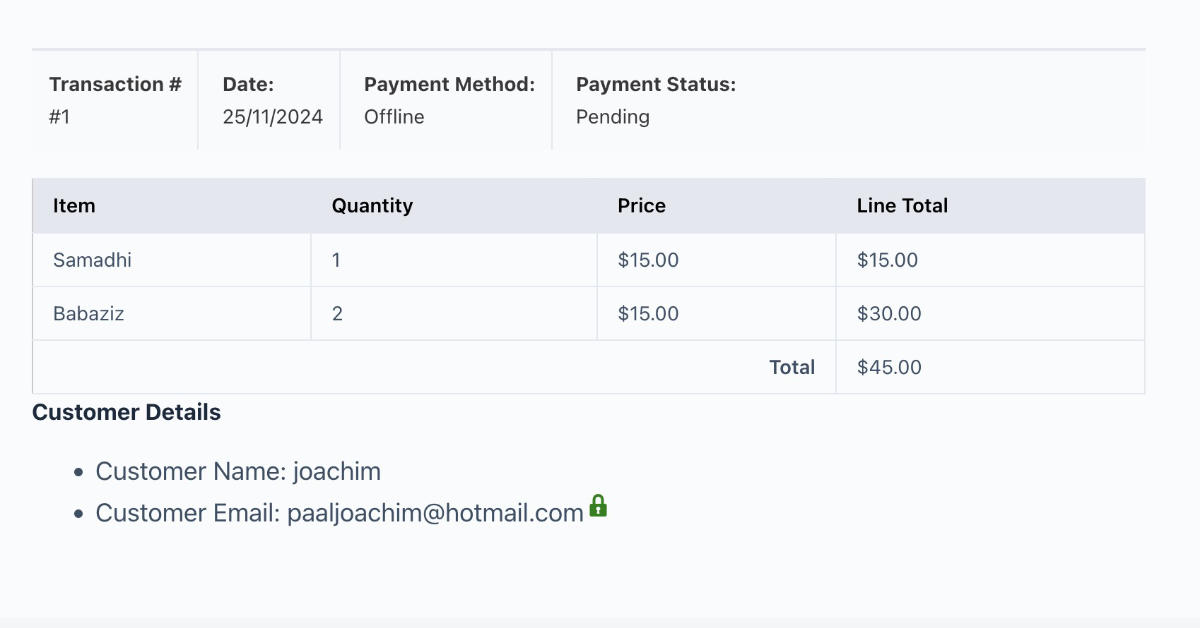
Go to the frontend and the order page and make a test order. The confirmation message will be seen with a link to the Payment Management page. The Payment Management screen looked like this when I made an order.
I plan on adding additional tutorials in regards to purchasing products.
Resources used:
WordPress Fluent Forms Payment Integration.
https://fluentforms.com/wp-fluent-forms-payment-integration/
Create the Perfect Bakery Order Form.
https://fluentforms.com/create-the-perfect-bakery-order-form/
Searching for Fluent Forms Payment at Youtube.
https://www.youtube.com/results?search_query=fluent+forms+payment
Goodbye WooCommerce | Easy E-Commerce With Fluent Forms Pro
https://www.youtube.com/watch?v=le_gwnjpEJo

