How to create a WordPress multisite network.
The following step by step tutorial is based on the “Create a network” WordPress support article.
A multisite is a collection of single sites that together creates a multisite network.
1- Before we begin.
We must decide if we want to use sub-domains or sub-directories.
Sub-domains look like this: subdomain.multisitenetwork.com.
Sub-directories look like this: multisitenetwork.com/sub-directory.
(Sub-directories are easier to work with.)
Deactivate all plugins.
2- Allow Multisite
To enable the Network Setup menu item, we must first define multisite in the wp-config.php file. Through FTP or the control panel file manager we need to open up wp-config.php and add this line above where it says
/* That’s all, stop editing! Happy blogging. */
If it doesn’t say that anywhere, then add the line somewhere above the first line that begins with require or include:
/* Multisite */
define( 'WP_ALLOW_MULTISITE', true );
Refresh the browser before continuing.
3- Installing a Network.
In the WordPress backend: Go to Tools -> Network Setup.
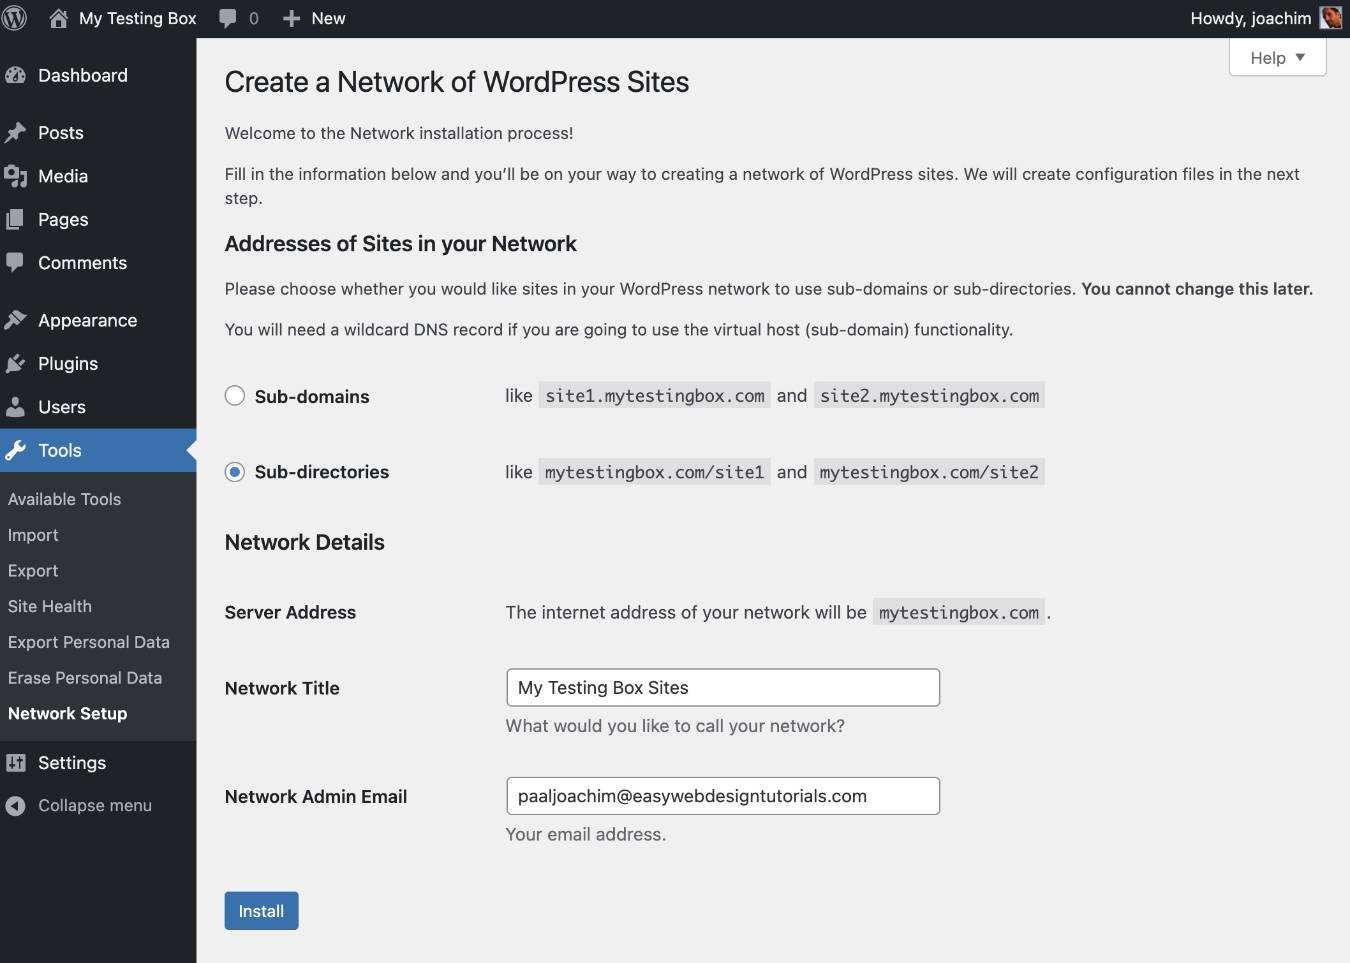
Select Sub-domains or Sub-directories. Fill in the Network Title and Network Admin Email.
Click the Install button.
4- Enabling the Network.
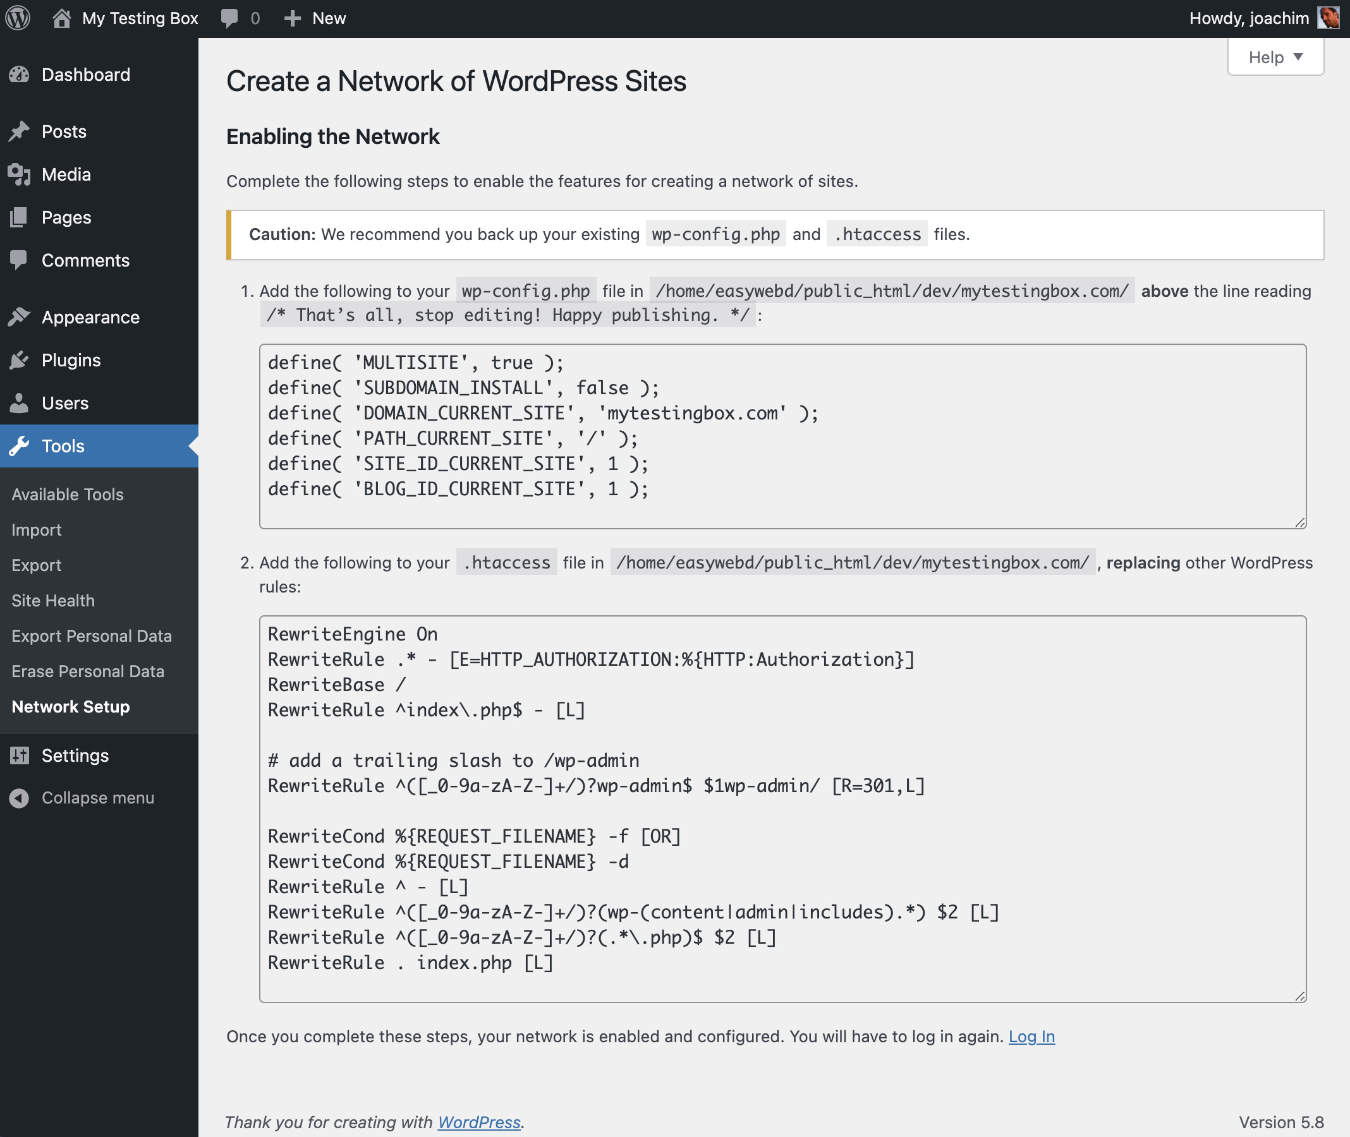
1. Add the following to your wp-config.php file in /home/easywebd/public_html/dev/mytestingbox.com/
above the line reading:
/* That’s all, stop editing! Happy publishing. */
define( 'MULTISITE', true );
define( 'SUBDOMAIN_INSTALL', false );
define( 'DOMAIN_CURRENT_SITE', 'mytestingbox.com' );
define( 'PATH_CURRENT_SITE', '/' );
define( 'SITE_ID_CURRENT_SITE', 1 );
define( 'BLOG_ID_CURRENT_SITE', 1 );
2. Add the following to your .htaccess file in /home/easywebd/public_html/dev/mytestingbox.com/, replacing other WordPress rules:
RewriteEngine On
RewriteRule .* - [E=HTTP_AUTHORIZATION:%{HTTP:Authorization}]
RewriteBase /
RewriteRule ^index\.php$ - [L]

# add a trailing slash to /wp-admin
RewriteRule ^([_0-9a-zA-Z-]+/)?wp-admin$ $1wp-admin/ [R=301,L]

RewriteCond %{REQUEST_FILENAME} -f [OR]
RewriteCond %{REQUEST_FILENAME} -d
RewriteRule ^ - [L]
RewriteRule ^([_0-9a-zA-Z-]+/)?(wp-(content|admin|includes).*) $2 [L]
RewriteRule ^([_0-9a-zA-Z-]+/)?(.*\.php)$ $2 [L]
RewriteRule . index.php [L]
Once you complete these steps, your network is enabled and configured. You will have to log in again.
The network is now complete.
Additional reading:
https://wpbuffs.com/wordpress-multisite/
Troubleshooting tips.
If you had a warning message about “bad nonce” then be sure to clear the cache multiple times. Do also check this article if needed: https://tommcfarlin.com/resolving-the-wordpress-multisite-redirect-loop/
Multisite tips!
When I gather a bunch of tips it will become its own tutorial.
To change the upload size limit.
Go to: My Sites -> Settings -> Network Settings -> scroll down the page to you find: Max upload file size option.

