There are two parts to this tutorial. Setting up Fluent Forms and setting up Fluent Forms SMTP.
Go directly to the Fluent Forms video tutorials below the step by step written documentation.
A summery for setting up a Fluent Forms form .
- Add or adjust an existing form.
- Adjust the confirmation message.
- Add or adjust the Admin Email notification. Remember to also adjust the Advanced section.
- Enable Honey Pot and Akismet to protect the forms.
- Add the Form to a contact page.
– Part 1 – setting up Fluent Forms –
1. In the backend of WorPress. Go to Fluent Forms -> Forms.
Click Add New Form edit one of the default forms.
Clicking Add New Form one can choose from:
– New Blank Form
– Choose a Template
– Create Conversational Form
Make a selection. For this site I selected New Blank Form and began the process of adding the fields I needed.
The below is the result of the form I made for this site. (It might be changed later on.)
Be sure to rename the form by clicking the top left name.
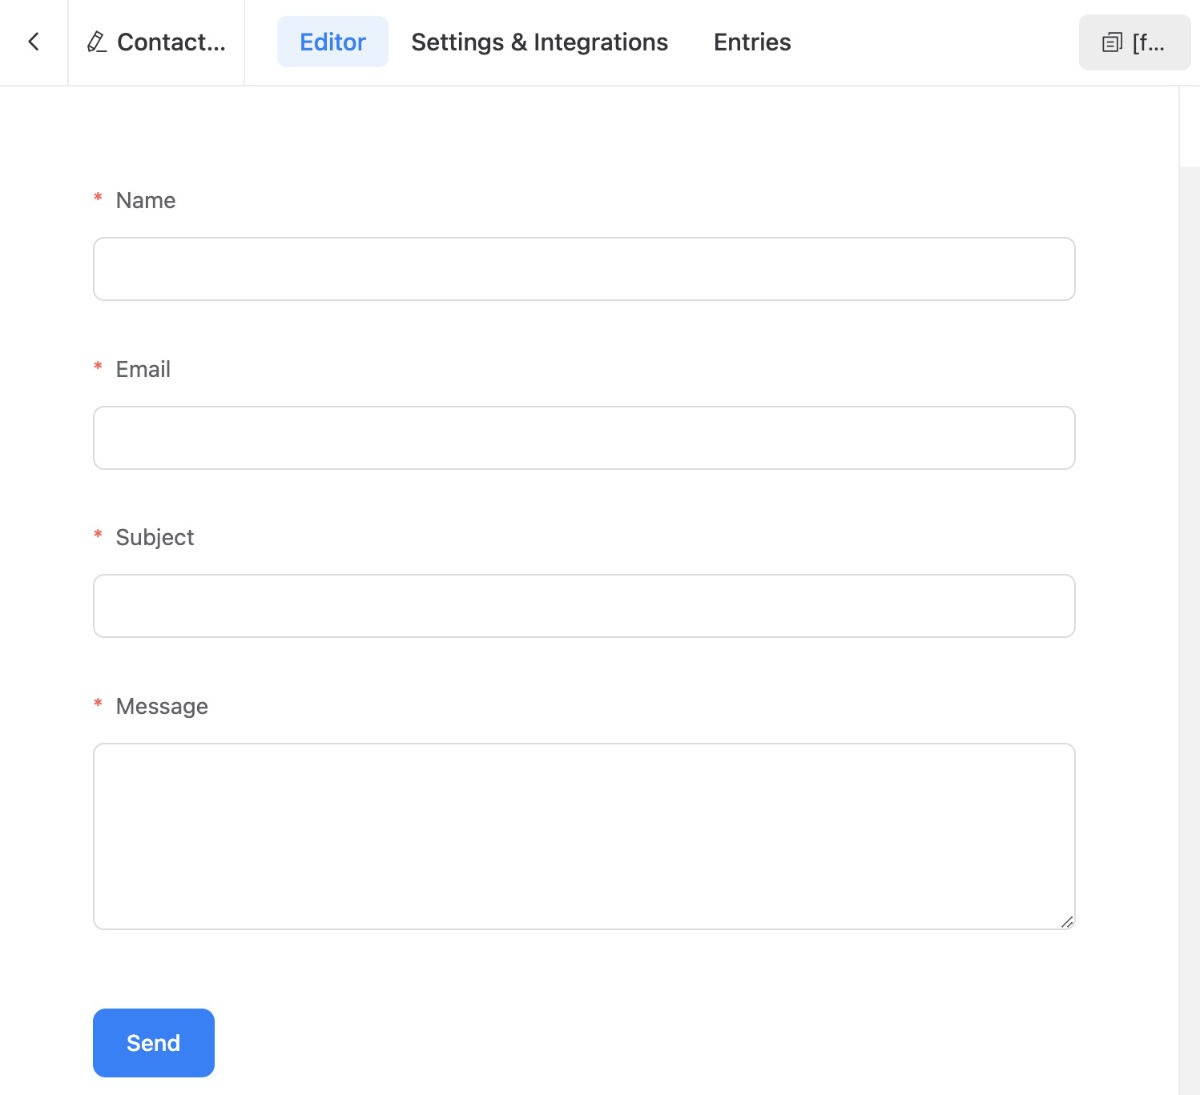
2. Select Settings & Integrations.
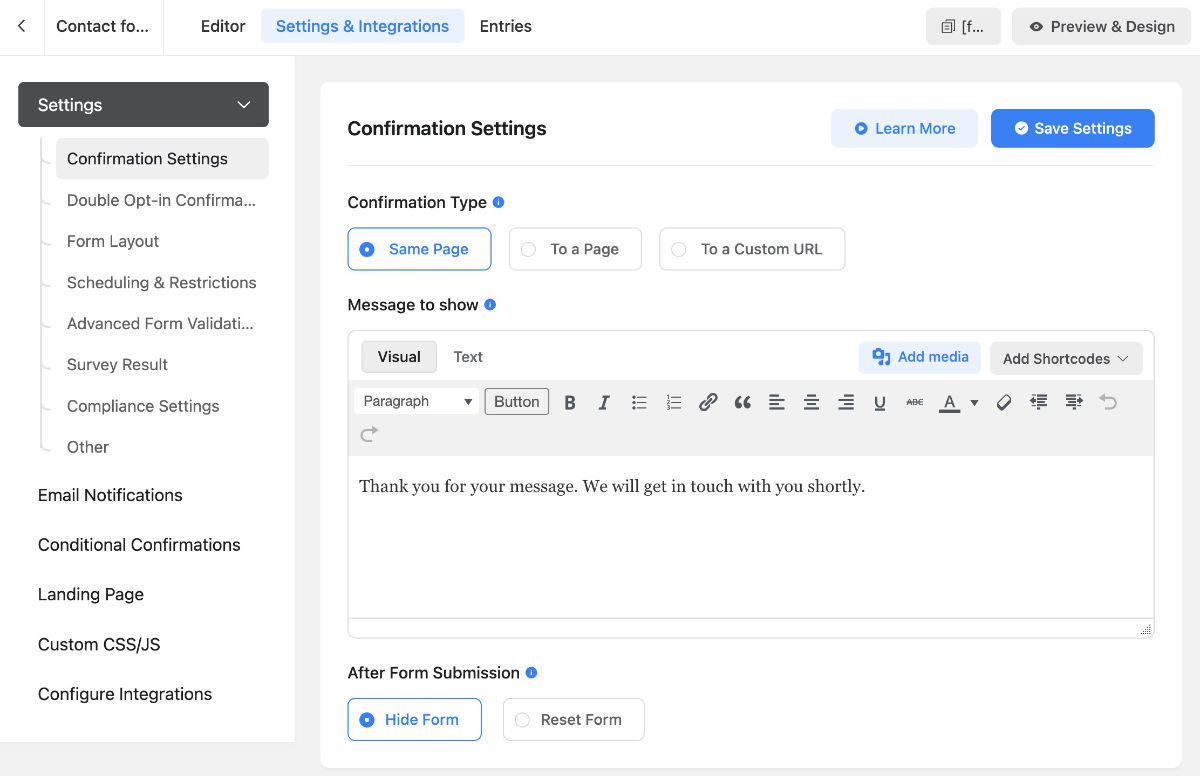
Change the Confirmation Settings message if you’d like
Currently this is the default message: “Thank you for your message. We will get in touch with you shortly.”
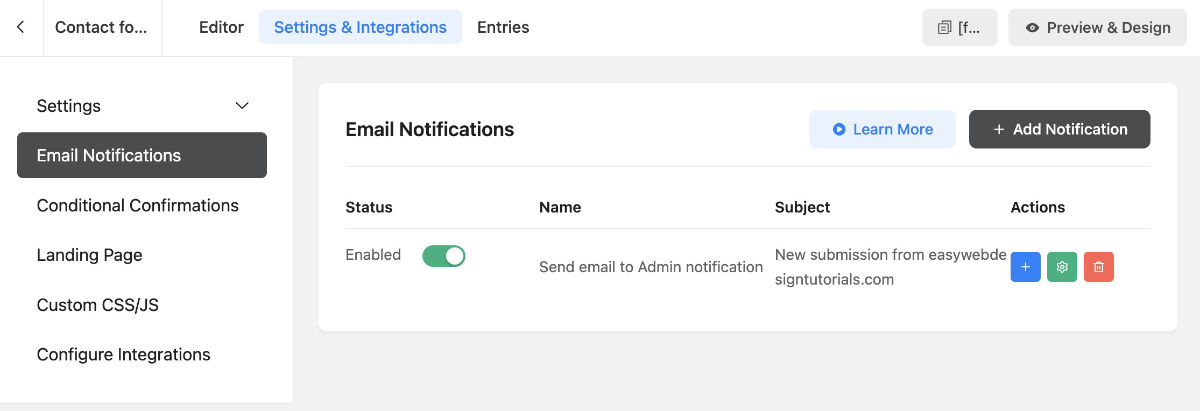
3. Select Email Notifications -> add or adjust an admin notification to get entries submitted by mail.
Be sure that it is also Enabled.
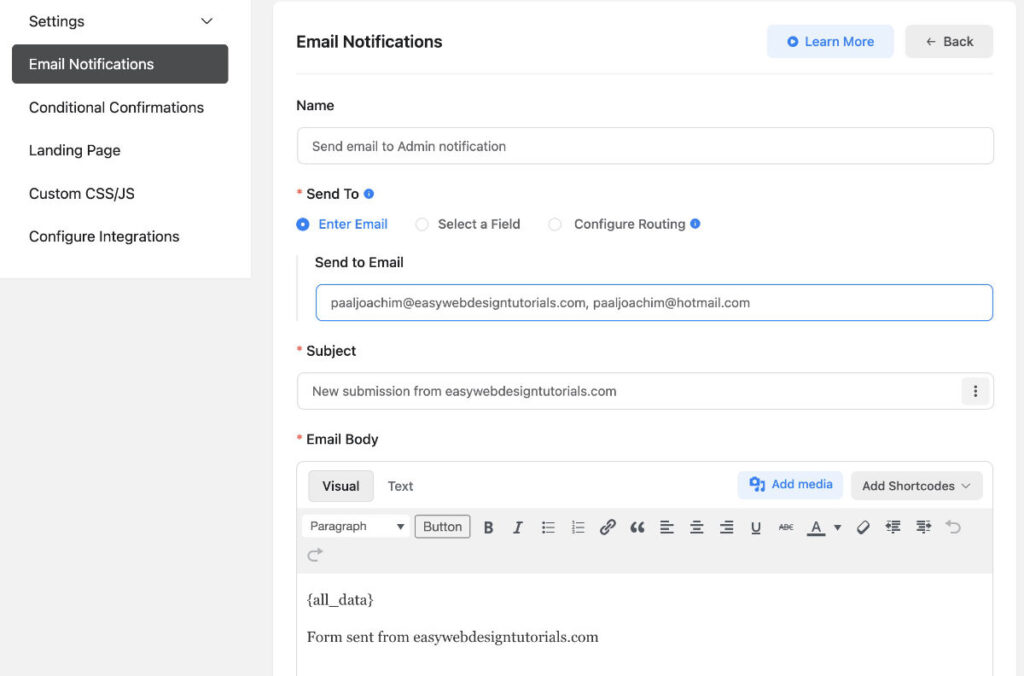
Filling in an Admin Email Notification.
NB. If this is not filled in one will NOT get get an email notifying that someone has submitted an email through the contact form.
Adding or adjusting an Admin notification.
– Fill in: Send to Email. The email address that should get the admin notification that a new email has arrived. If multiple email addresses are to receive the notification then add a comma between each email address just like I did.
– Add a suitable subject line. For instance I added: “New submission from easywebdesigntutorials.com”
– Add information to the Email Body. I clicked the Add shortcodes and added All data shortcode: {all_data} to get all the data that was submitted. I then also added: “Form sent from easywebdesigntutorials.com”
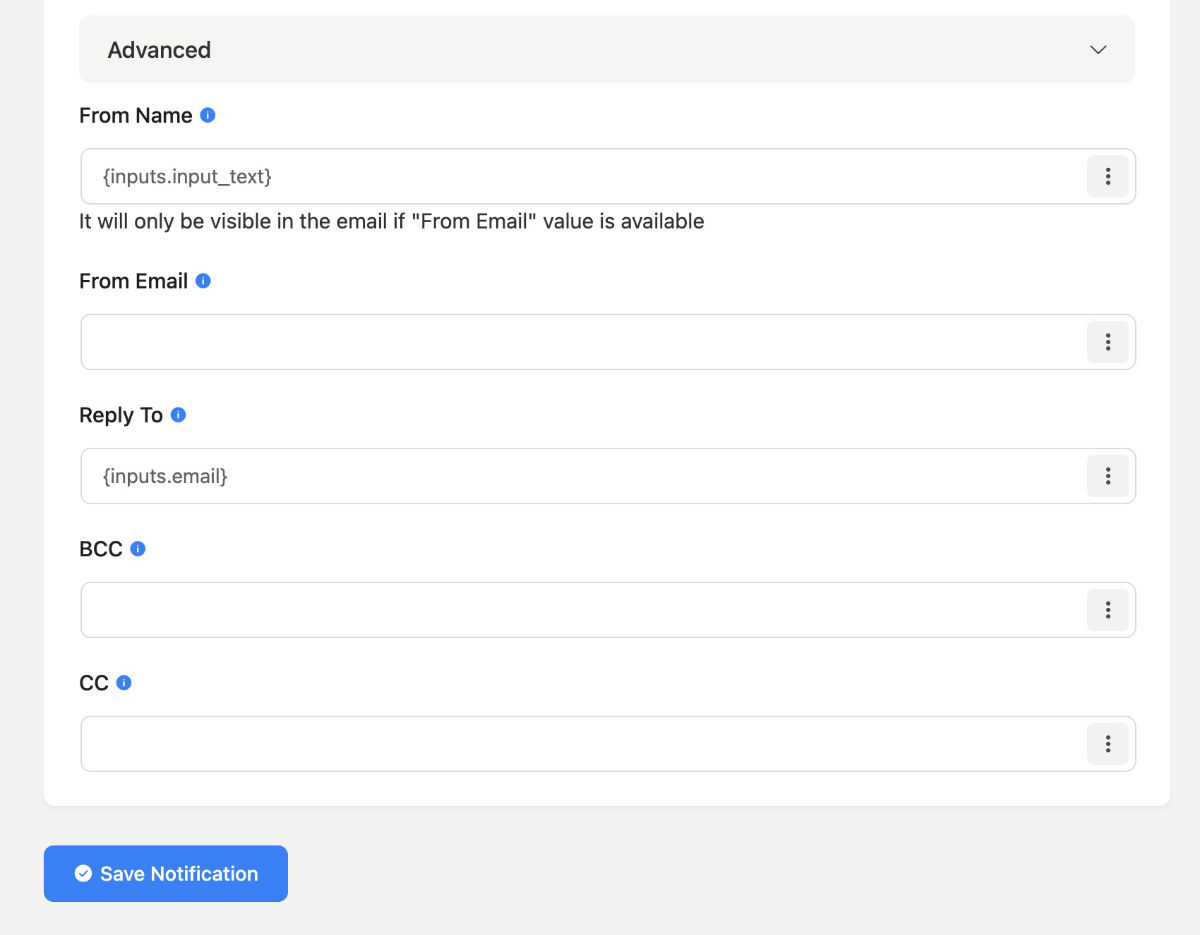
Still in the Admin notification: Click the Advanced tab further down the screen.
Add the following by clicking the 3 dots on the right side.
From Name whom it was sent from and Reply to their email address. This is what it looks like for this site:
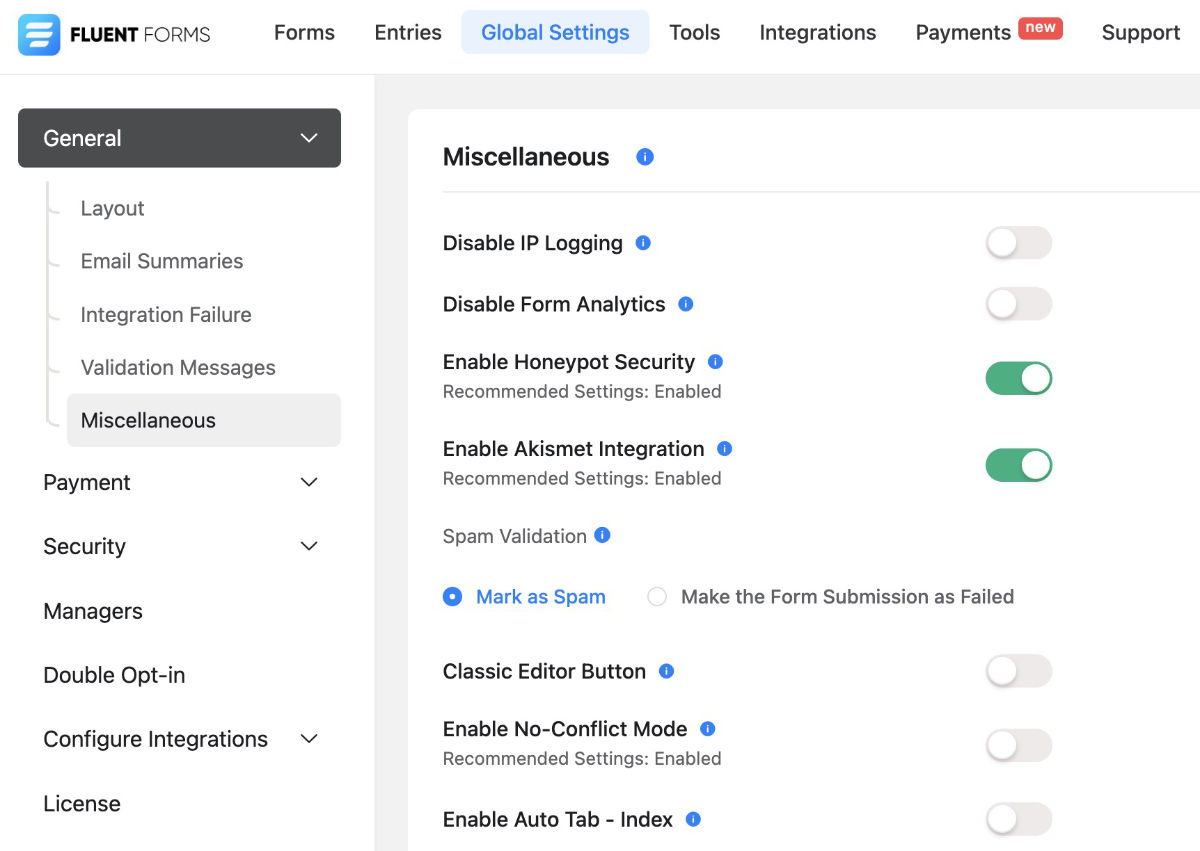
4. To protect your forms from spam. Go to Global Settings (see sidebar under Fluent Forms).
Go to General -> Miscellaneous and enable using Honey Pot and Akismet. This will greatly improve the security of all the forms on the site.
Honey pot is meant to trick bots into filling in an invisible field only bots can see. If this field is filled in then the email will not go through or be marked as spam.
Akismet will in general help a site by protecting comments and form submissions from various types of spam.
If the Akismet plugin is not listed then you might need to first install and activate and then come back into this screen to activate the protection of Akismet for all your forms.
The above steps is something I do for every site I use Fluent Forms for.
Part 1 – Setting up a Fluent Forms form.
Part 2 – Setting up FluentSMTP
Sometimes emails will not go through. Adding a SMTP plugin will help secure that emails do go through. If there is no domain email address in use for the site then use wordpress@then-add-the-domain-and-extension. Example for this tutorial site would be . Since I have a domain email adress I will use that.
I have setup SMTP plugins on various sites to make sure that emails are sent from the site to the receiver. I share through this video tutorial on how I setup FluentSMTP. I use the basic setup with PHP. Another option could be to use Brevo which is a SMTP service. Then add an email address.
I have setup an affiliate link if you would like to purchase the Fluent Forms Pro plugin.
Resources:
fluentforms.com/blog/
https://fluentforms.com/docs/
wpmanageninja.com/docs/fluent-form/how-to-use-wp-fluent-form/email-notification/
fluentsmtp.com

